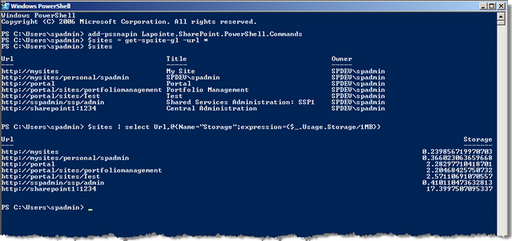
Microsoft Sharepoint 2010 is one of the new products which supports Windows Powershell commands. Its really easy to do the most tasks you do normally in the Sharepoint Central Administration with Powershell.
Microsoft created a Powershell Snapin for Sharepoint 2010, which is called “Microsoft.Sharepoint.Powershell”. This enables a lot of new Powershell cmdlets for Sharepoint.
With these small scripts you can simply create a new WebApplication and/or a new Sharepoint Site Collection.
Accessing Windows PowerShell for SharePoint 2010 Products
After installing SharePoint 2010 Products, the applicable Windows PowerShell cmdlets are available by using the SharePoint 2010 Management Shell, or by using the Windows PowerShell console. With the management shell, you can manage every aspect of SharePoint 2010 Products. You can create new site collections, Web applications, user accounts, service applications, proxies, and more. The commands from the management shell output SharePoint objects based on the Microsoft .NET Platform. These objects can be applied as input to subsequent commands or stored in local variables for later use.
With the management shell, you do not have to register the snap-in that contains the cmdlets. Registration of the Microsoft.SharePoint.PowerShell.dll module for SharePoint 2010 cmdlets is automatic, as a result of the line Add-PSSnapin Microsoft.SharePoint.PowerShell in the SharePoint.ps1 file located in %CommonProgramFiles%\Microsoft Shared\Web Server Extensions\14\Config\PowerShell\Registration. If you choose to use the Windows PowerShell console, you must register this snap-in manually.
Whether you are using the management shell or the Windows PowerShell console, you can also load additional snap-ins. For more information, see Customizing Profiles (http://go.microsoft.com/fwlink/p/?LinkId=183166).
To access the SharePoint 2010 Management Shell:
- On the Start menu, click All Programs.
- Click Microsoft SharePoint 2010 Products.
- Click SharePoint 2010 Management Shell.
“
Add the Sharepoint cmdlets to PowerShell:
If you open PowerShell normally you will want to add the SharePoint PowerShell snapin using the following command:
Add-PsSnapin Microsoft.SharePoint.PowerShell |
“
Creating a new SharePoint 2010 Web Application:
The Powershell command for creating a new Web Application is New-SPWebApplication.
Get-Help New-SPWebApplication
NAME
New-SPWebApplication
SYNOPSIS
Creates a new Web application within the local farm.
SYNTAX
New-SPWebApplication -ApplicationPool
|
Creating a new SharePoint 2010 Web Application:
# SharePoint cmdlets
Add-PsSnapin Microsoft.SharePoint.PowerShell
# Set variables
$WebAppName = "Contoso Sharepoint1"
$WebAppHostHeader = "sharepoint1.contoso.com"
$WebAppPort = 80
$WebAppAppPool = "SharePoint1AppPool"
# This User has to be a Sharepoint Manager Account
$WebAppAppPoolAccount = "contoso\sp_serviceuser"
$WebAppDatabaseName = "Sharepoint1"
$WebAppDatabaseServer = "SQLServer\InstanceName"

# Create a new Sharepoint WebApplication
New-SPWebApplication -Name $WebAppName -Port $WebAppPort -HostHeader $WebAppHostHeader -URL ("http://" + $WWebAppHostHeader) -ApplicationPool $WebAppAppPool -ApplicationPoolAccount (Get-SPManagedAccount $WebAppAppPoolAccount) -DatabaseName $WebAppDatabaseName -DatabaseServer $WebAppDatabaseServer
|
Creating a new SharePoint 2010 Site Collection:
# SharePoint cmdlets Add-PsSnapin Microsoft.SharePoint.PowerShell # Templates # Name Title LocaleId Custom # ---- ----- -------- ------ # GLOBAL#0 Global template 1033 False # STS#0 Team Site 1033 False # STS#1 Blank Site 1033 False # STS#2 Document Workspace 1033 False # MPS#0 Basic Meeting Workspace 1033 False # MPS#1 Blank Meeting Workspace 1033 False # MPS#2 Decision Meeting Workspace 1033 False # MPS#3 Social Meeting Workspace 1033 False # MPS#4 Multipage Meeting Workspace 1033 False # CENTRALADMIN#0 Central Admin Site 1033 False # WIKI#0 Wiki Site 1033 False # BLOG#0 Blog 1033 False # SGS#0 Group Work Site 1033 False # TENANTADMIN#0 Tenant Admin Site 1033 False # Languages # Name Title # ---- ----- # German 1031 # English 1033 # French 1036 # Spanish 1034 # Set variables $SiteCollectionName = "Homepage" $SiteCollectionURL = "http://sharepoint.contoso.com" $SiteCollectionTemplate = "STS#0" $SiteCollectionLanguage = 1033 $SiteCollectionOwner = "contoso\UserName" # Create a new Sharepoint Site Collection New-SPSite -URL $SiteCollectionURL -OwnerAlias $SiteCollectionOwner -Language $SiteCollectionLanguage -Template $SiteCollectionTemplate -Name $SiteCollectionName |
Creating a new Sharepoint WebApplication and a Sharepoint Site Collection:
# SharePoint cmdlets
Add-PsSnapin Microsoft.SharePoint.PowerShell
# Set variables
$WebAppName = "Contoso Sharepoint1"
$WebAppHostHeader = "sharepoint1.contoso.com"
$WebAppPort = 80
$WebAppAppPool = "SharePoint1AppPool"
# This User has to be a Sharepoint Manager Account
$WebAppAppPoolAccount = "contoso\sp_serviceuser"
$WebAppDatabaseName = "Sharepoint1"
$WebAppDatabaseServer = "SQLServer\InstanceName"
$SiteCollectionName = "Homepage"
$SiteCollectionURL = ("http://" + $WebAppHostHeader)
$SiteCollectionTemplate = "STS#0"
$SiteCollectionLanguage = 1033
$SiteCollectionOwner = "contoso\UserName"

# Create a new Sharepoint WebApplication
New-SPWebApplication -Name $WebAppName -Port $WebAppPort -HostHeader $WebAppHostHeader -URL ("http://" + $WebAppHostHeader) -ApplicationPool $WebAppAppPool -ApplicationPoolAccount (Get-SPManagedAccount $WebAppAppPoolAccount) -DatabaseName $WebAppDatabaseName -DatabaseServer $WebAppDatabaseServer

# Create a new Sharepoint Site Collection
New-SPSite -URL $SiteCollectionURL -OwnerAlias $SiteCollectionOwner -Language $SiteCollectionLanguage -Template $SiteCollectionTemplate -Name $SiteCollectionName
|
